
How to Connect to K1VPN on iOS Without Installing Any Extra App
Step-by-step guide to connecting K1VPN on iPhone and iPad using the built-in IKEv2 client - no additional software installation required.
Last updated:
If you prefer not to fill your phone with extra applications, K1VPN has you covered. iOS includes a built-in VPN client with full support for the IKEv2 protocol - one of the most secure and stable protocols available. You'll be connected to your chosen server in under 2 minutes.
Step 1: Get Your Credentials from the Dashboard
If you paid by card: Log in to the login page using the email and password you provided during registration. If you have forgotten your password, you can reset it from the same page.
If you paid with cryptocurrency: Log in to the anonymous login page using the username and password that appeared on your screen before the payment - the ones you noted down or saved in the txt file.
Important for cryptocurrency users: If you have lost your dashboard login credentials, unfortunately there is no way to recover them.
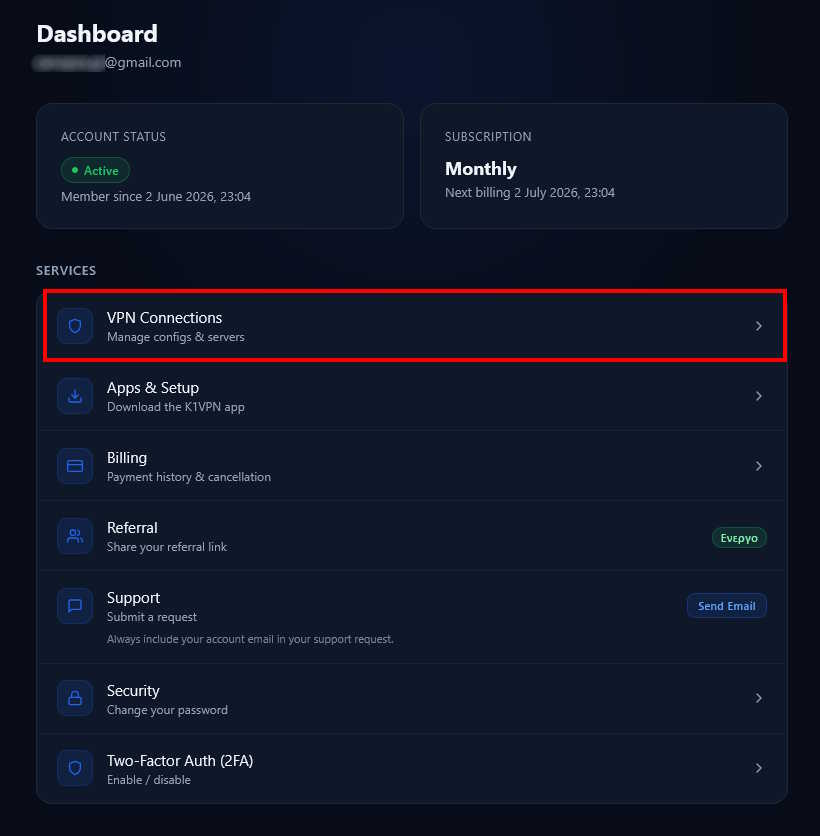
Once logged in to your dashboard, select the "VPN Connections" card.
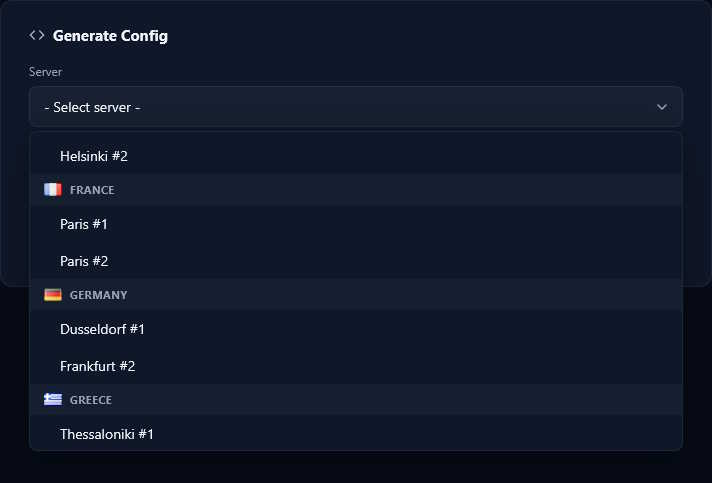
You will be taken to the configuration retrieval page. Scroll down to the "Generate Config" card and select the server you want to connect to.
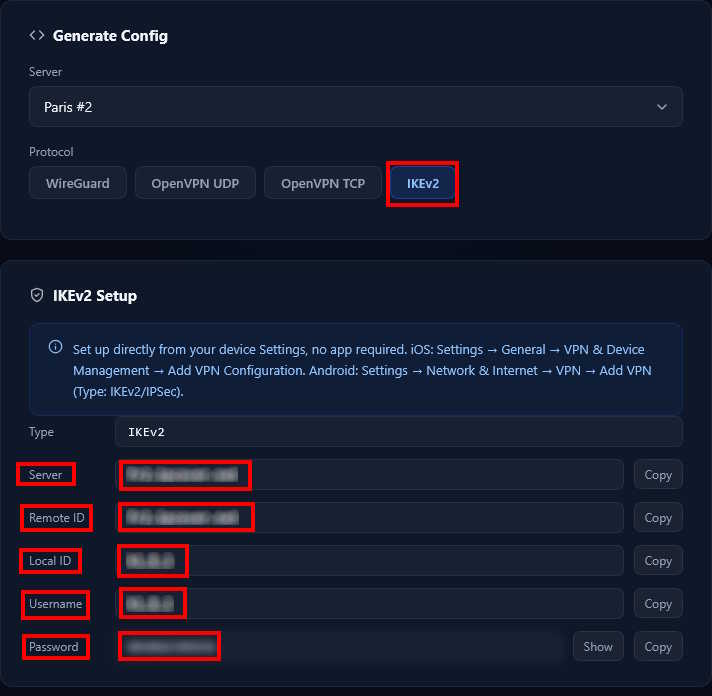
Next, select the IKEv2 protocol. All the details you need for the setup will appear automatically for the next step.
Step 2: Configure the VPN Connection on iOS
On your iOS device, open Settings and select VPN.
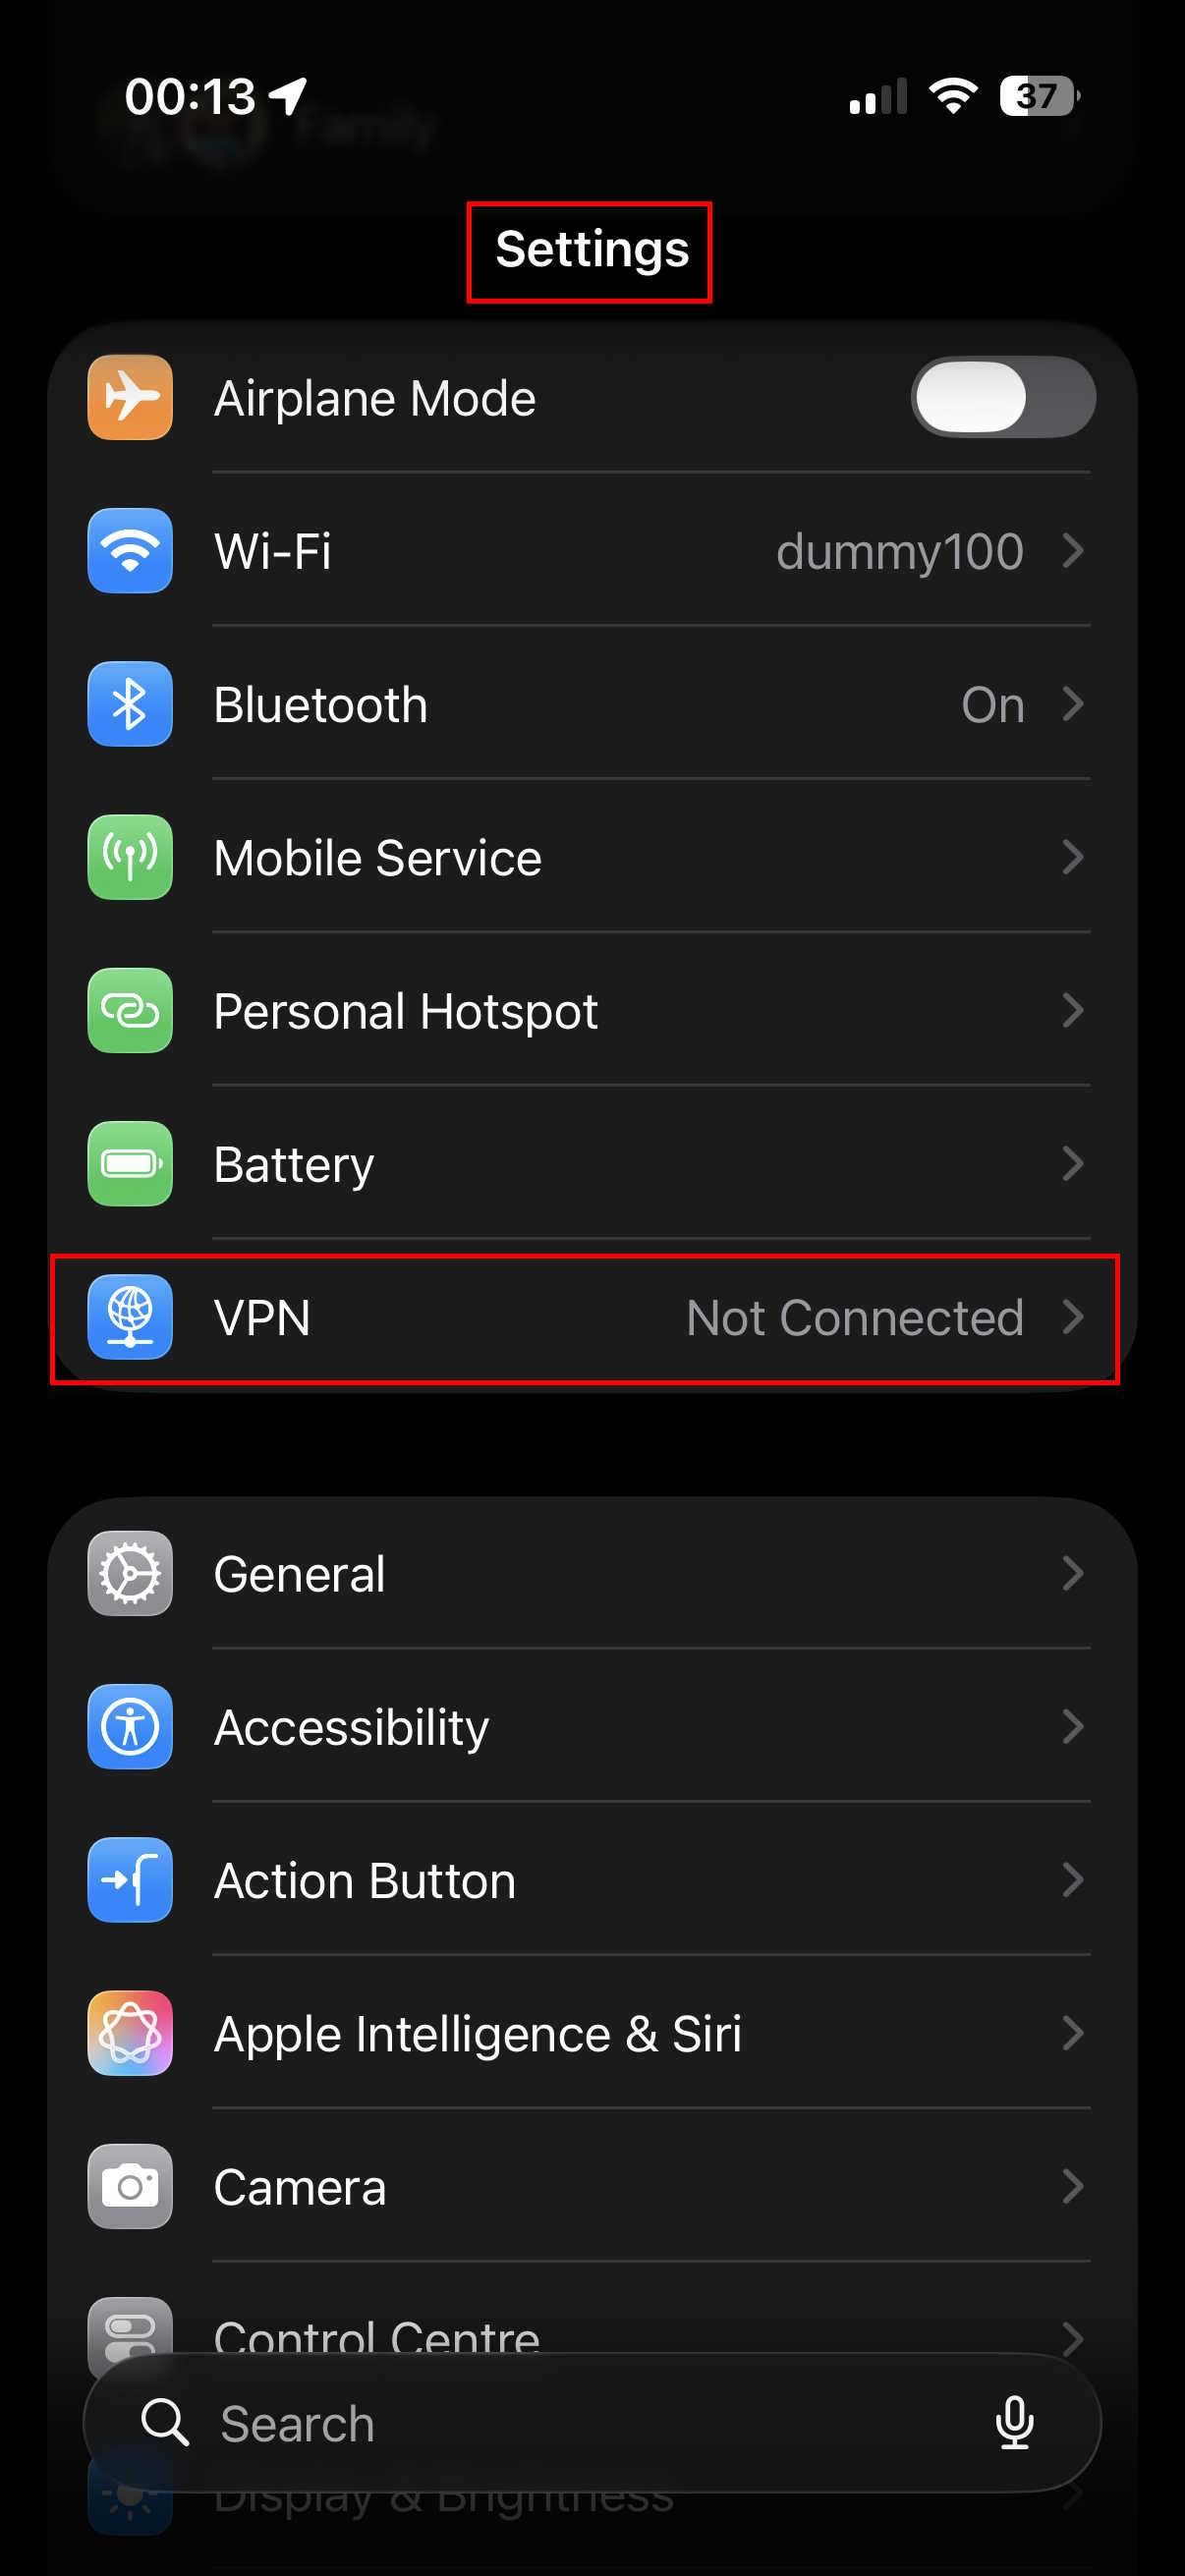
The VPN screen will appear, showing any existing configurations. At the bottom, tap "Add VPN Configuration...".
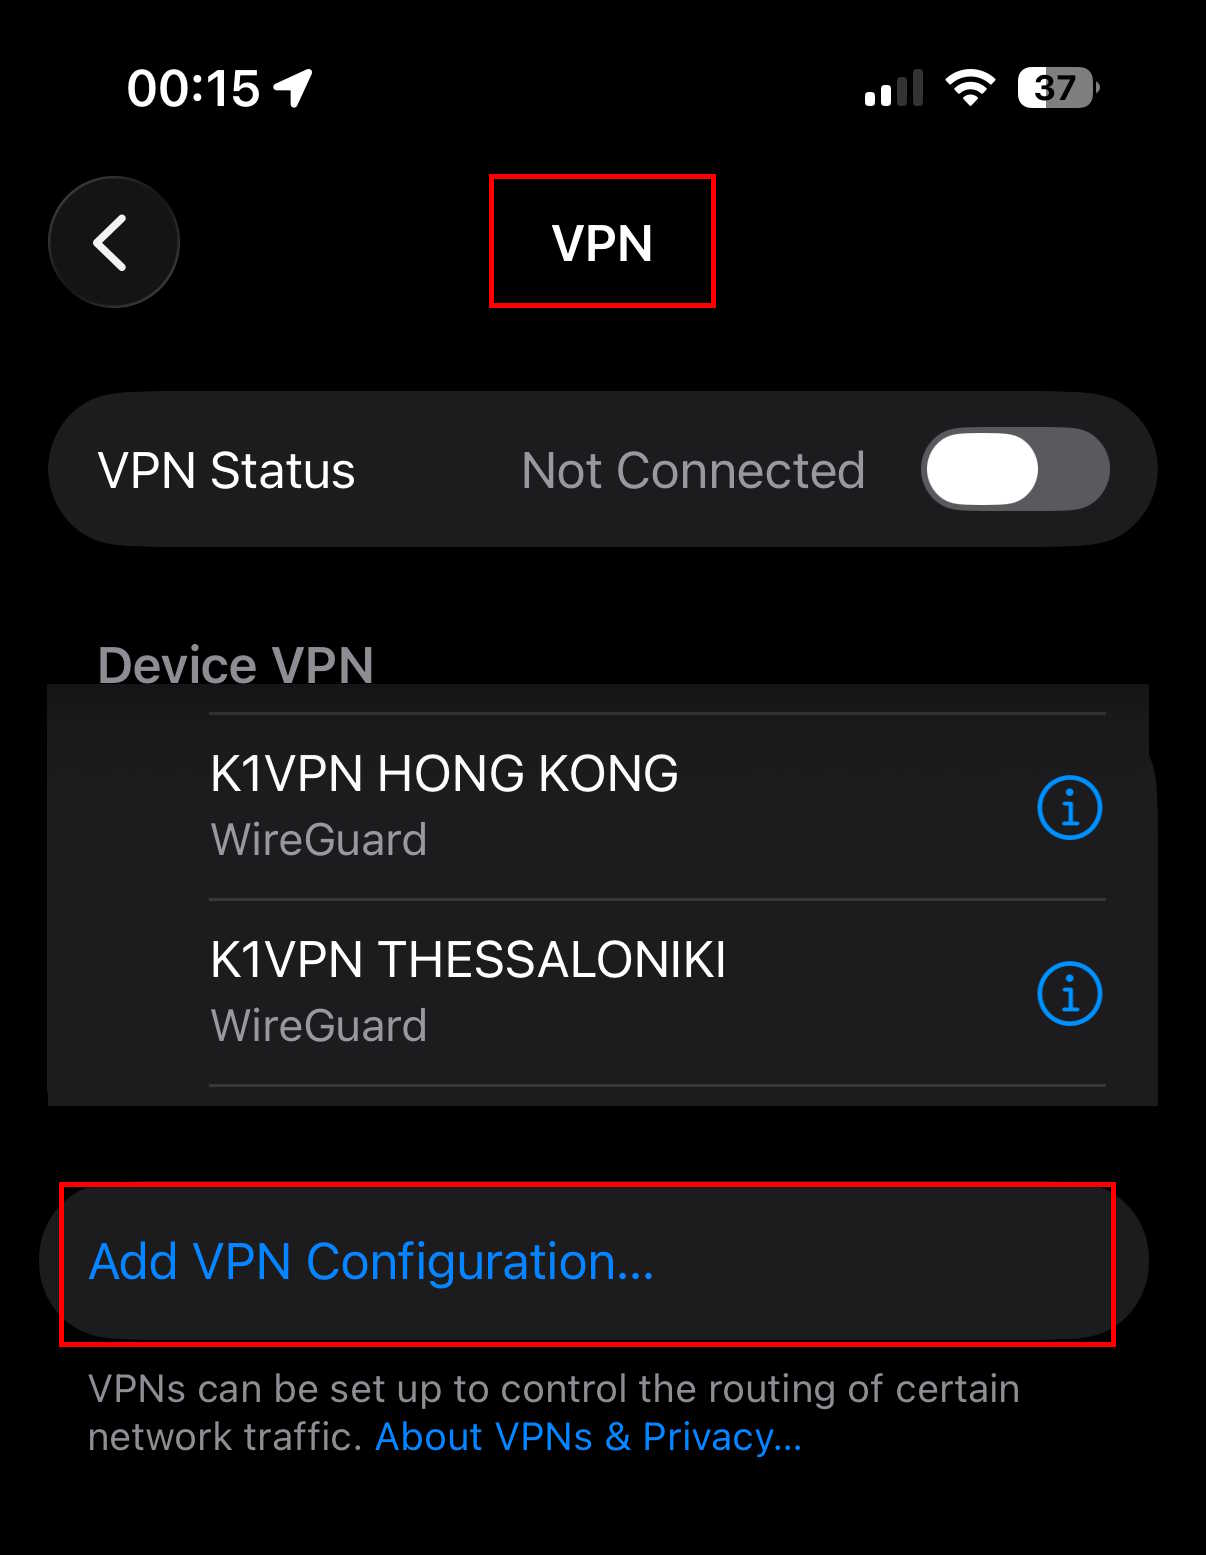
The new configuration card will open. Fill in the fields exactly as described below, using the details you found in Step 1.
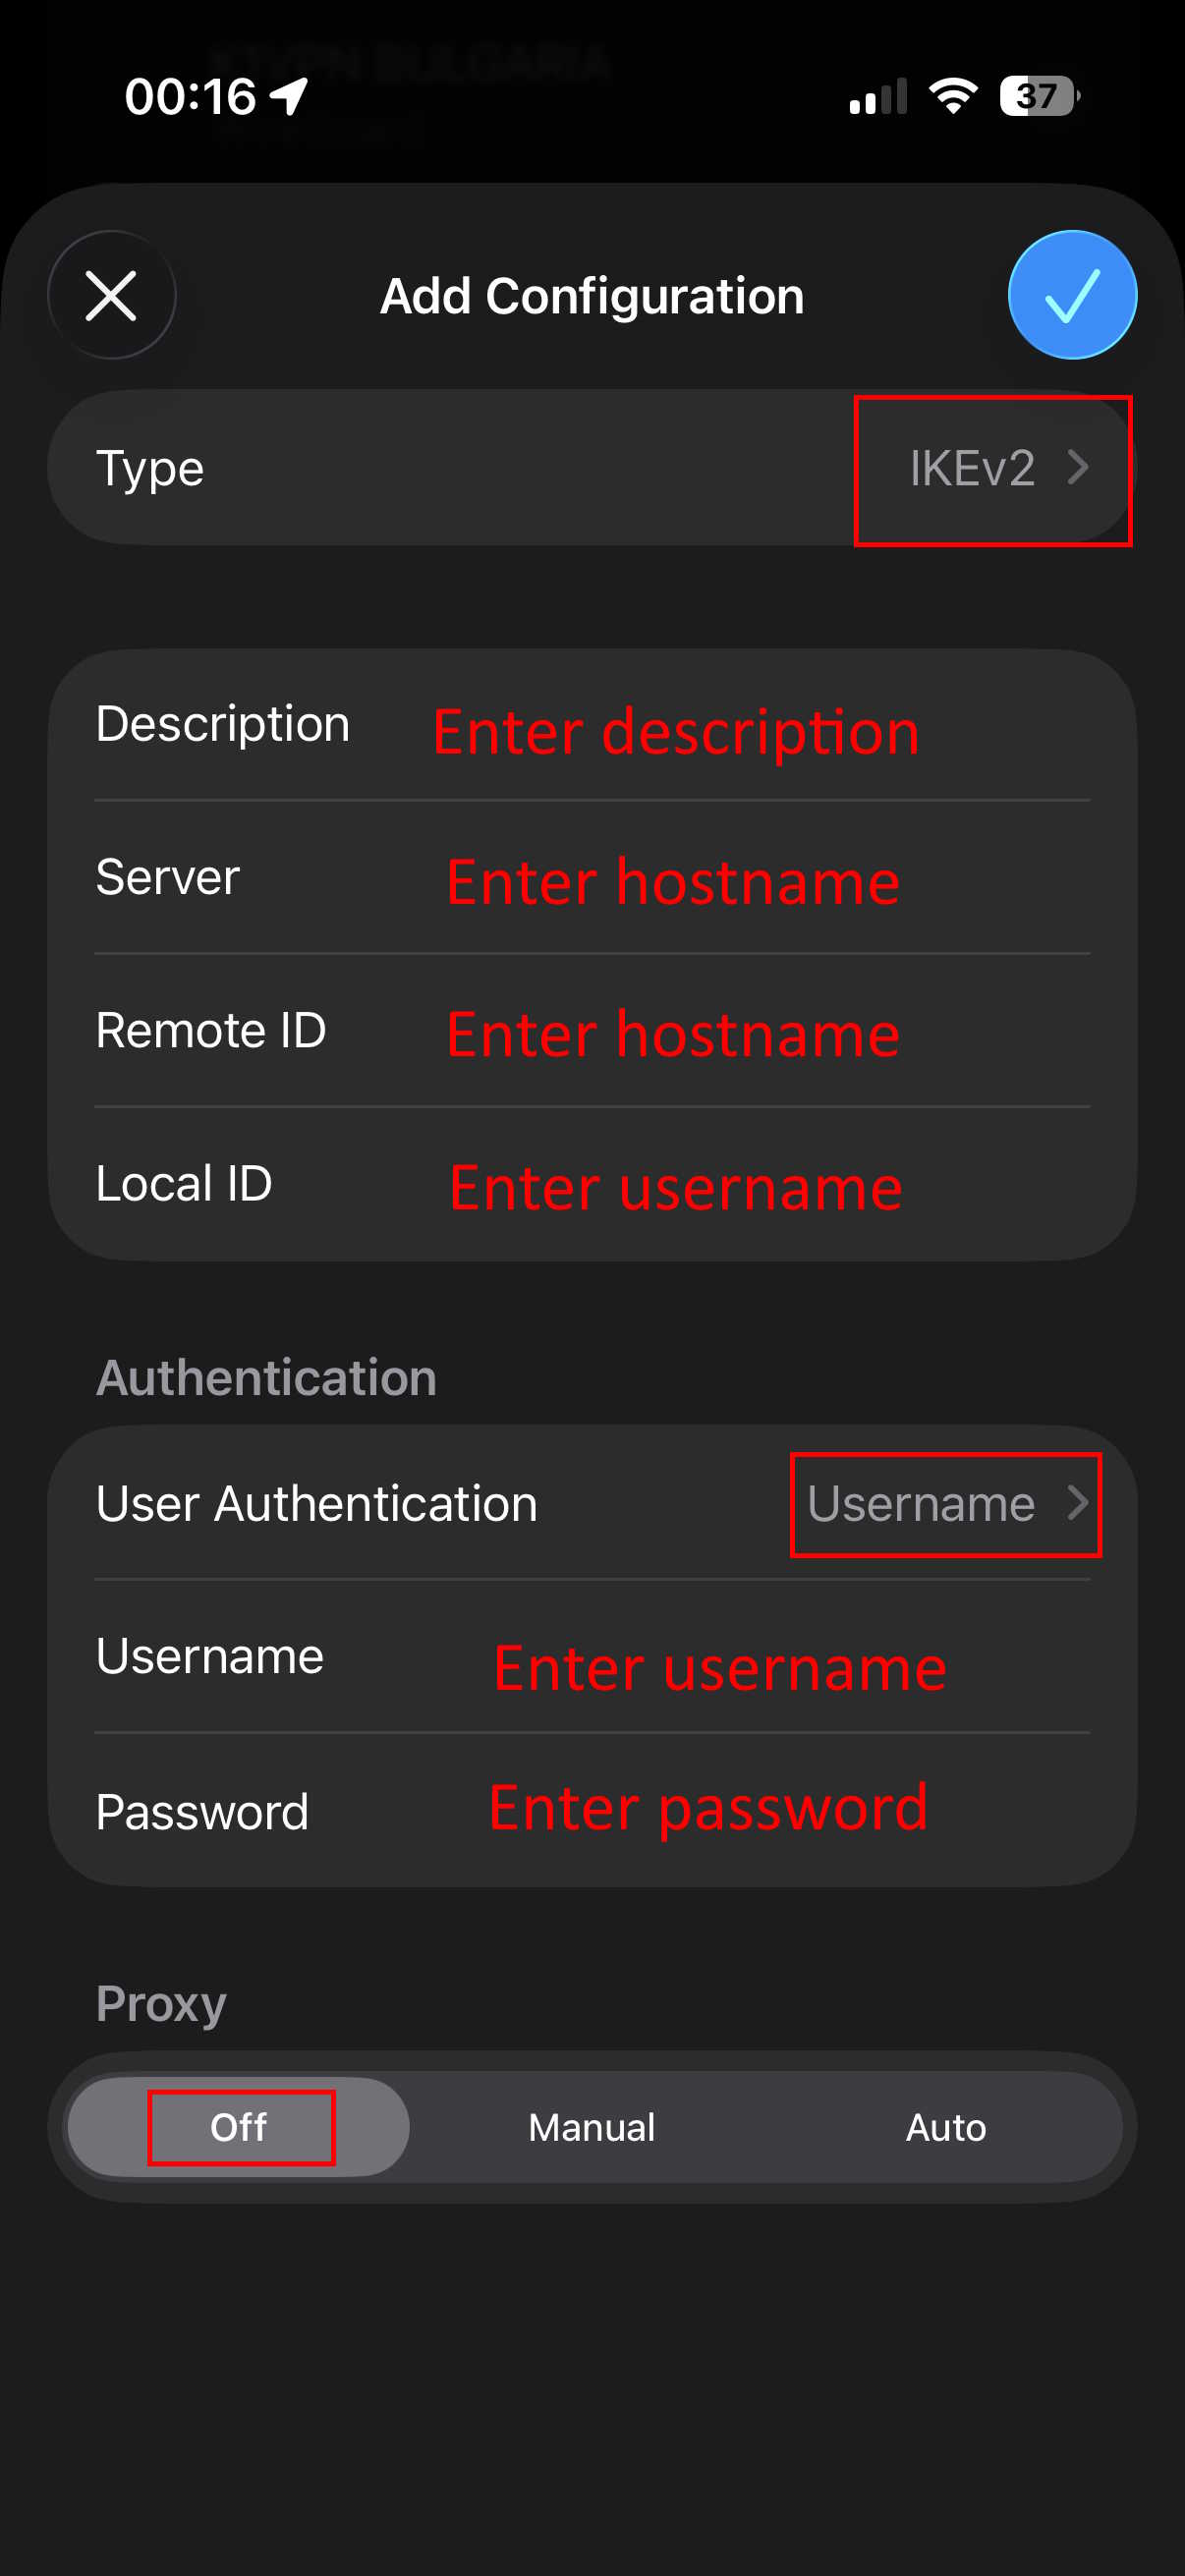
- Type: Select IKEv2
- Description: A descriptive connection name, e.g. "K1VPN Germany"
- Server: The hostname of the server you selected in the dashboard
- Remote ID: The same hostname as the field above
- Local ID: Your username
- User Authentication: Username
- Username: Your username (same as Local ID)
- Password: Your password
- Proxy: Leave it set to Off
Tap the checkmark in the top-right corner to save the configuration.
Step 3: Connect
After saving, you will return to the VPN screen, where the new connection you just created now appears. Select it and toggle the switch in the top-right corner.
Congratulations! You are now successfully connected to K1VPN without having installed any additional application on your iOS device. You can browse anonymously and securely.
Note: You can create as many configurations as you like, one for each server/location you want to connect to, so you can switch your IP with a single tap. You cannot have more than one active IKEv2 connection at a time on your device, but you can have up to 10 devices connected simultaneously to the K1VPN network.
See also: Connect on Windows without an app (IKEv2) - the same process for your computer. Connect using WireGuard® on iOS and Android - an alternative method using a QR code. Connect using the K1VPN app - the easiest method for all devices.
For more tips on security and online anonymity, visit our Security & Privacy category. For K1VPN network updates, check K1VPN News, and for general privacy-focused industry news, Industry News.