
How to Connect to K1VPN Using OpenVPN® on Windows, macOS and Linux
Step-by-step guide to connecting K1VPN with OpenVPN® on Windows, macOS and Linux - the most reliable protocol for bypassing firewalls and maximum compatibility.
Last updated:
In this step-by-step guide you will learn how to connect to the K1VPN network using OpenVPN® on desktop and laptop computers running Windows, macOS or Linux.
For mobile devices (iOS, Android) and routers please refer to the dedicated guides linked at the bottom of this page.
Why Choose OpenVPN®?
While WireGuard® is the newer and faster option, OpenVPN® remains the gold standard in the VPN industry thanks to its years of proven reliability. It is the ideal choice when you:
- Need maximum compatibility with older systems or corporate networks
- Want to bypass strict firewalls or government restrictions - it can disguise VPN traffic as regular HTTPS traffic on port 443
- Require flexibility in configuring ports and transport protocols
Step 1: Generate a Configuration File for Your Chosen Server
Log in to your dashboard via a browser.
If you paid by card: Log in to the login page using the email and password you provided during registration. If you have forgotten your password, you can reset it from the same page.
If you paid with cryptocurrency: Log in to the anonymous login page using the username and password that appeared on your screen before the payment.
Important for cryptocurrency users: If you have lost your dashboard login credentials, unfortunately there is no way to recover them.
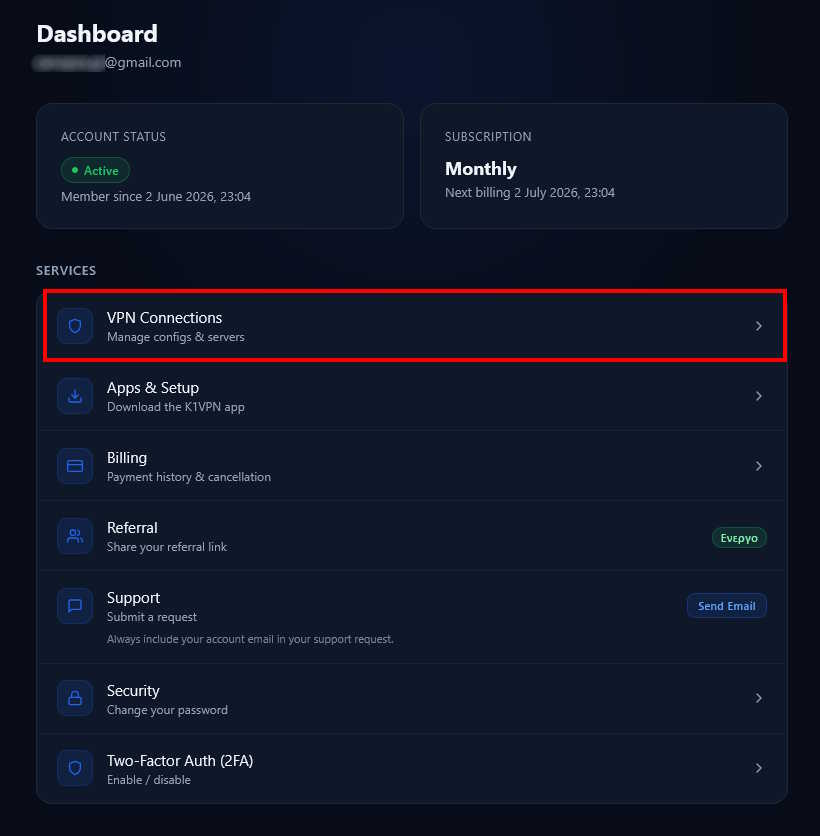
Once logged in, select the "VPN Connections" card.
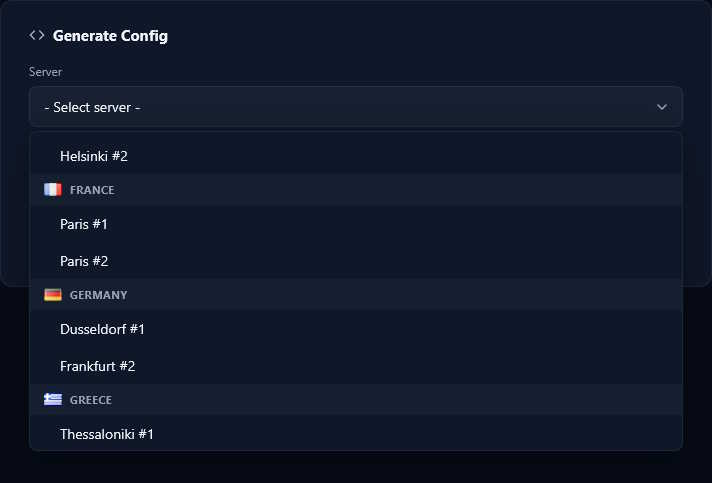
You will be taken to the configuration retrieval page. Scroll down to the "Generate Config" card and select the server you want to connect to.
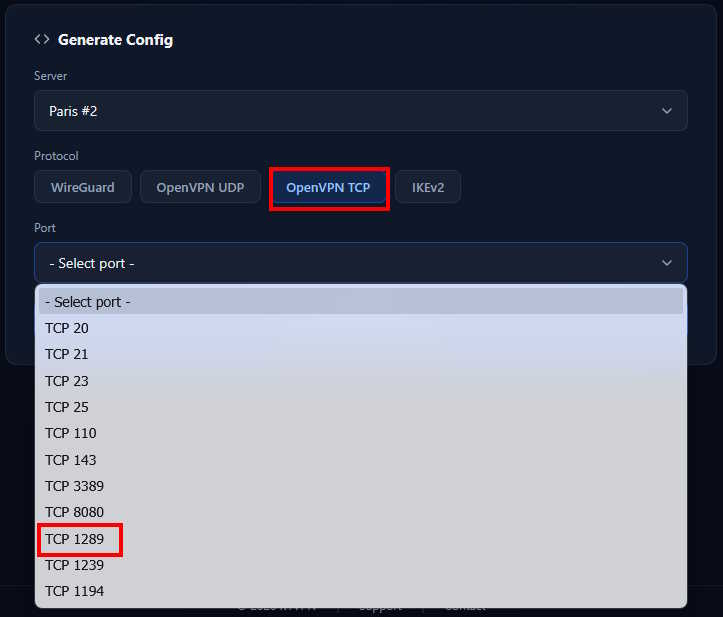
In the card below, select OpenVPN® TCP or OpenVPN® UDP and your preferred port. In our example we have selected TCP 1289.
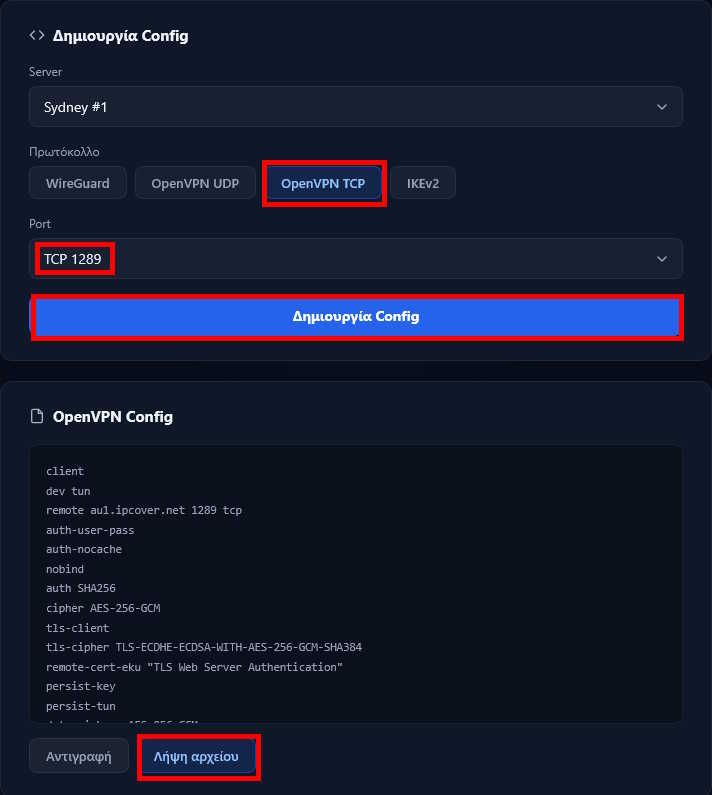
Click "Generate Config". We recommend clicking "DOWNLOAD" to save the *.ovpn file to your computer - you will import it directly in the next step.
Step 2: Install OpenVPN® Connect
Go to the official page openvpn.net/client, download the package for your operating system and install it. After installation and accepting the terms, you will see the initial screen:
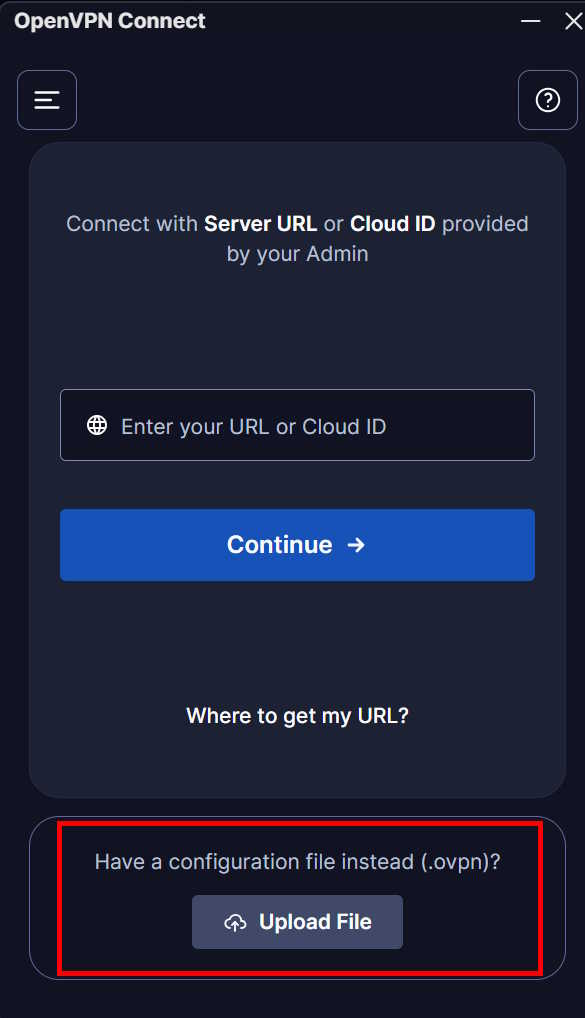
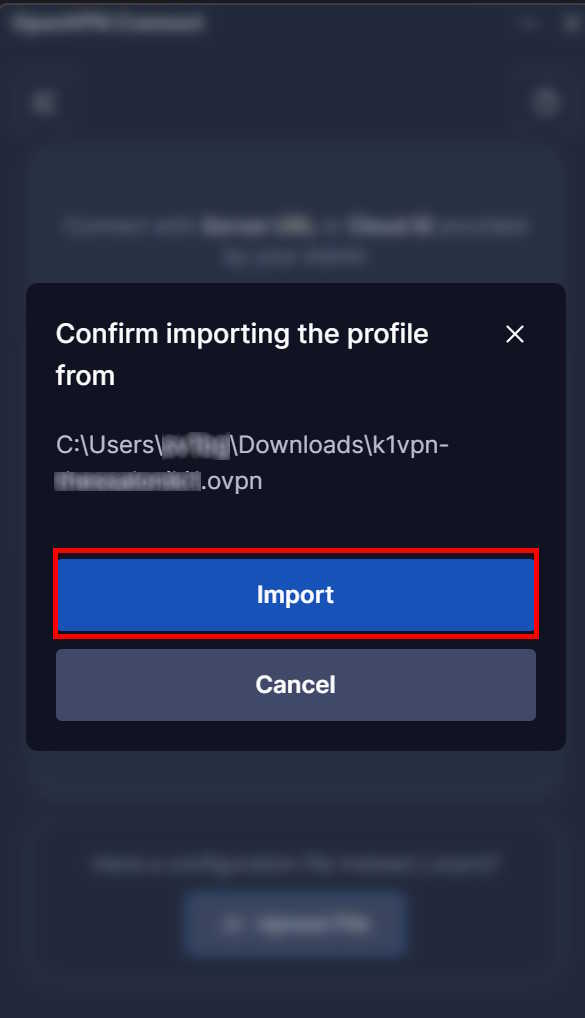
Click "UPLOAD FILE" and select the .ovpn file you downloaded in Step 1. In the popup that appears, click "IMPORT".
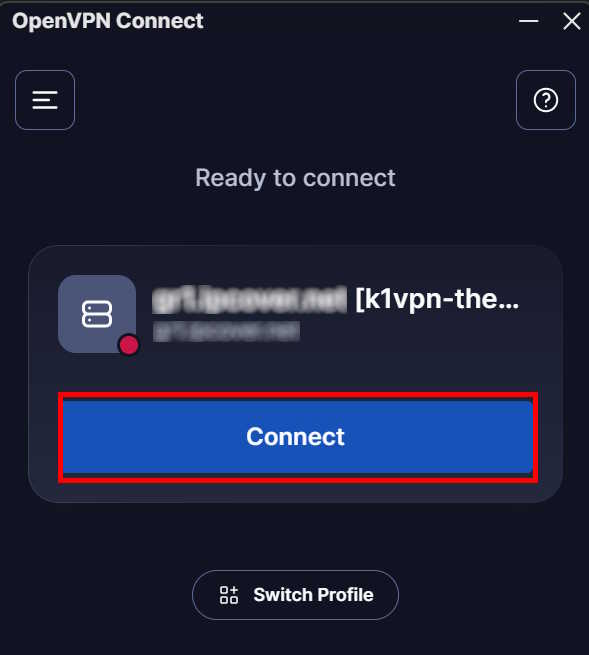
The new connection will appear showing the server you selected. Click "CONNECT".
You will be prompted for your username and password.
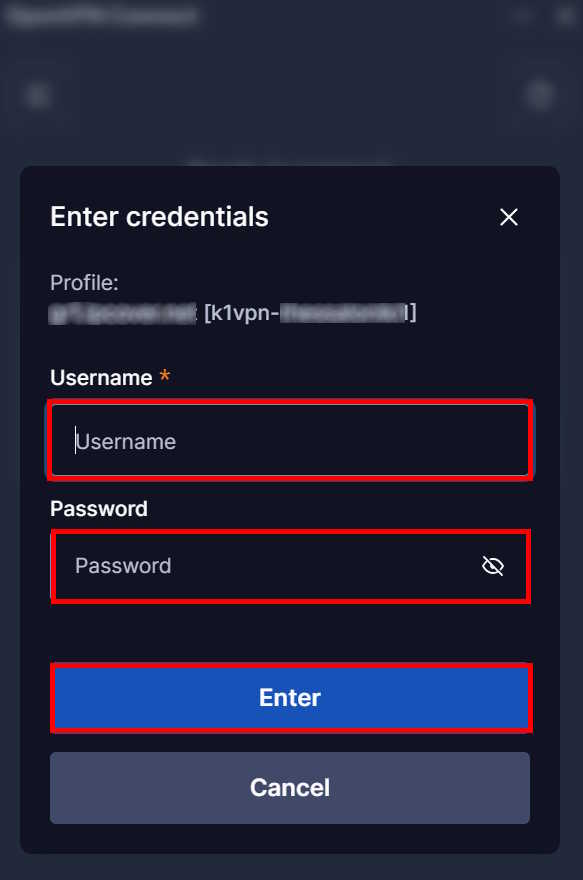
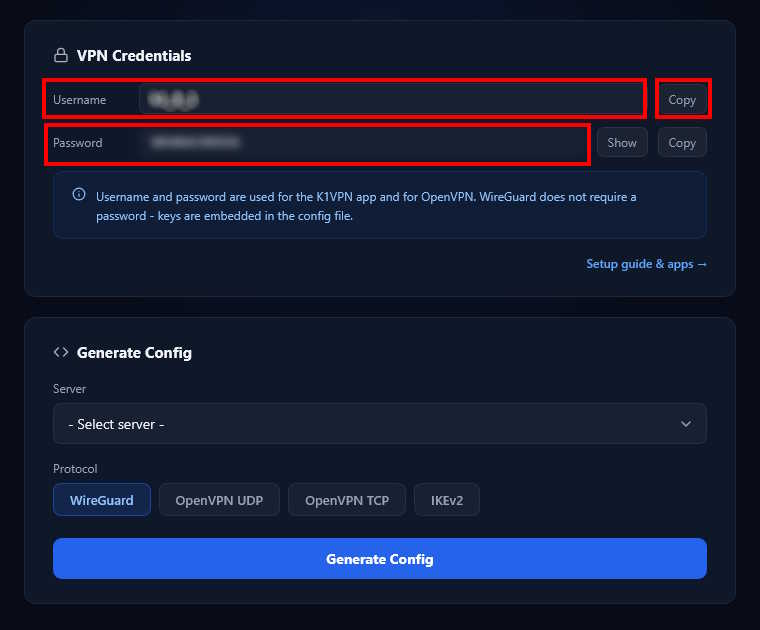
To find them, return to your browser and dashboard on the "VPN Connections" page - at the top you will see the "VPN CREDENTIALS" tab with your username and password. Copy and paste them into the corresponding fields in OpenVPN® Connect.
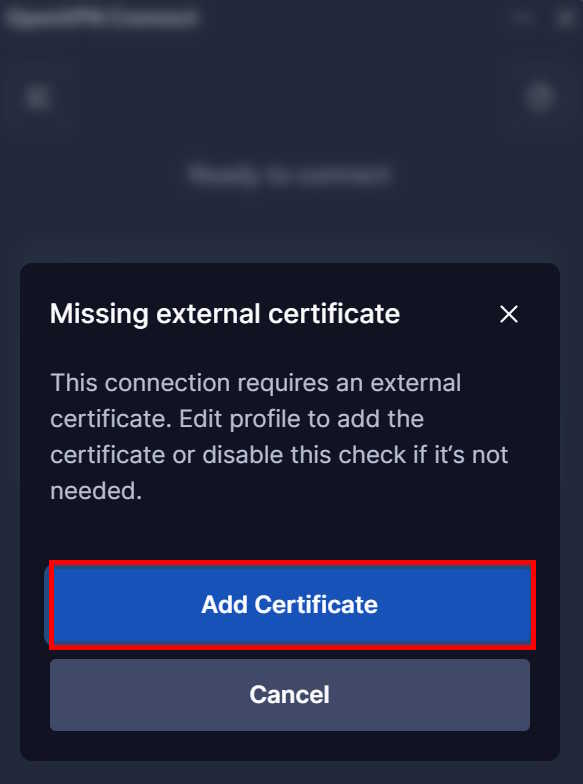
If a screen appears informing you about a missing external certificate, click "ADD CERTIFICATE" to disable the check.
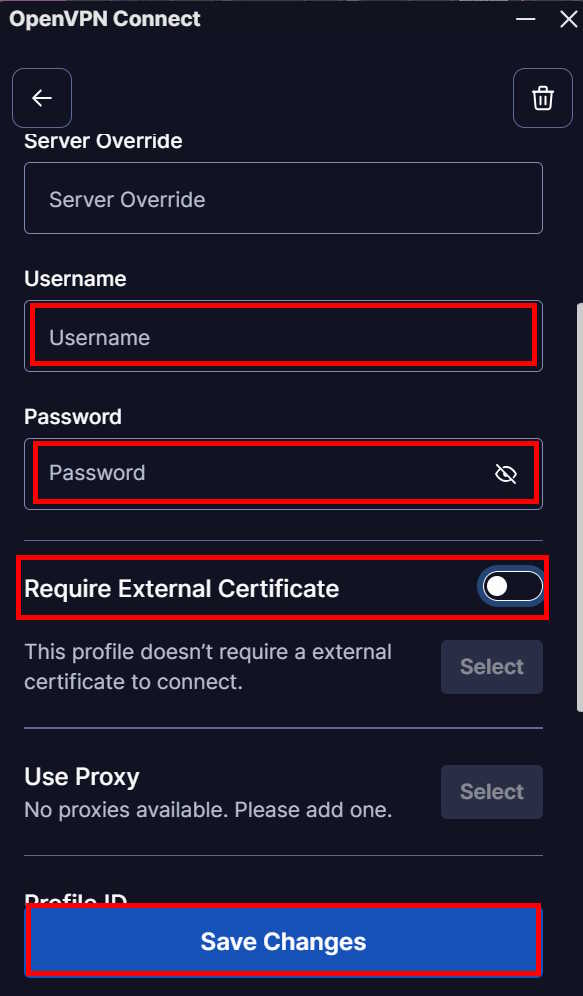
On the screen that follows, make sure "Require External Certificate" is UNCHECKED, re-enter your credentials if needed, and click "SAVE".
Step 3: Connect
The main screen shows the hostname of the server you selected. Click "CONNECT".
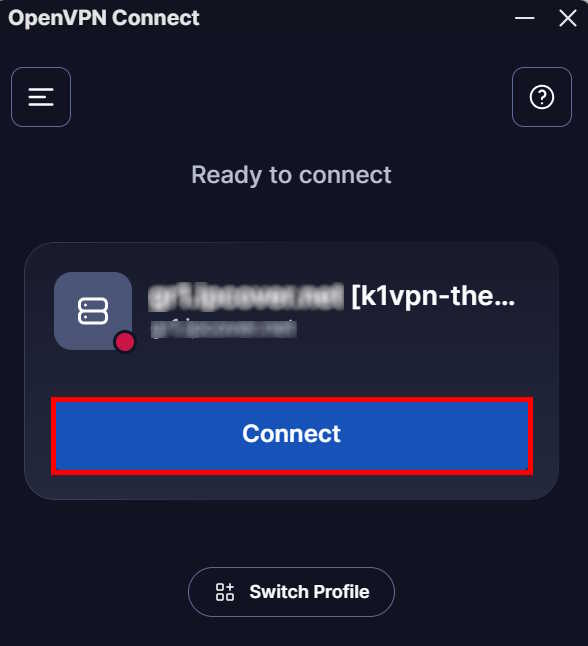
If you followed the steps correctly, the successful connection screen will appear.
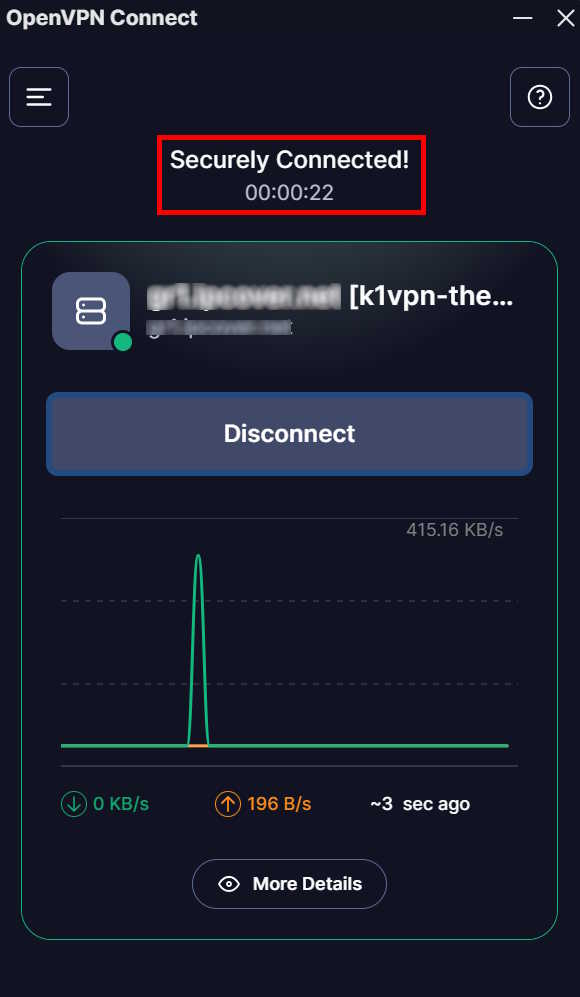
Congratulations! You have completed the setup and are now enjoying the anonymity and security provided by K1VPN.
TCP or UDP - which should I choose?
UDP (Recommended): The fastest option. Sends packets without waiting for delivery confirmation, resulting in low latency. Ideal for streaming, gaming and everyday use.
TCP (Alternative): Slower but extremely reliable. Verifies every packet and guarantees nothing is lost in transit. Best for unstable connections or bypassing strict firewalls via HTTPS/443.
In short: Choose UDP for speed. Switch to TCP only if you experience disconnections or network blocking.
See also: Connect using the K1VPN app - the easiest method for all devices. Connect on Windows without an app - IKEv2 - using the built-in Windows client. Connect with WireGuard® on Desktop - the fastest protocol.
For more tips on security and online anonymity, visit our Security & Privacy category. For K1VPN network updates, check K1VPN News, and for general privacy-focused industry news, Industry News.