
How to Connect to K1VPN Using WireGuard® on Windows, macOS and Linux
Step-by-step guide to connecting K1VPN with WireGuard® on Windows, macOS and Linux - the fastest VPN protocol for desktop devices.
Last updated:
In this step-by-step guide you will learn how to connect to the K1VPN network using WireGuard® - the fastest available VPN protocol - on Windows, macOS and Linux. For iOS, Android and routers, see the dedicated guides linked at the bottom of this page.
Step 1: Install WireGuard®
Go to the official page wireguard.com/install, download the latest version for your operating system and install it.
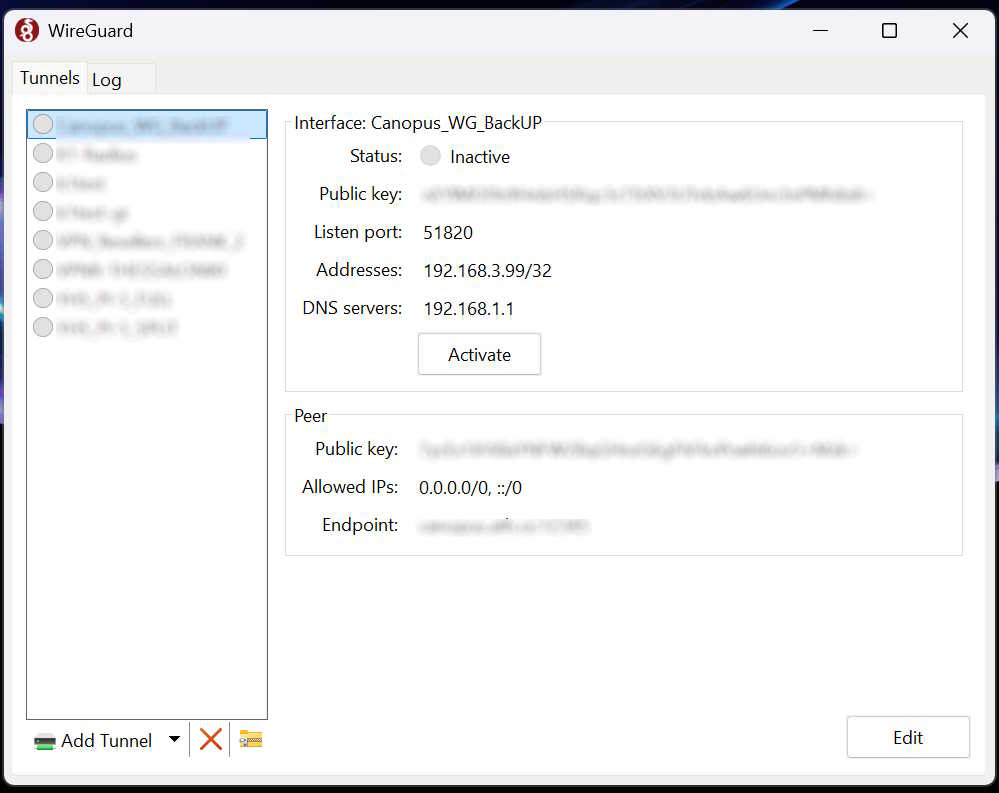
Launch the app. You will see an empty screen - the server list in the left column will be populated in the next steps.
Step 2: Generate a Configuration File for Your Chosen Server
Log in to your dashboard via a browser.
If you paid by card: Log in to the login page using the email and password you provided during registration. If you have forgotten your password, you can reset it from the same page.
If you paid with cryptocurrency: Log in to the anonymous login page using the username and password that appeared on your screen before the payment.
Important for cryptocurrency users: If you have lost your dashboard login credentials, unfortunately there is no way to recover them.
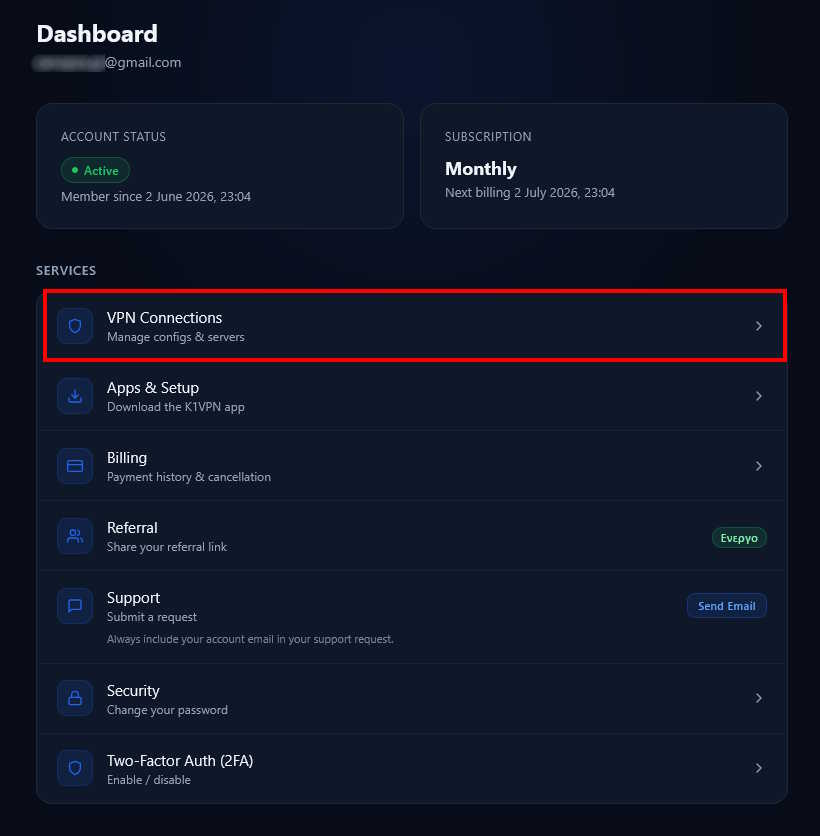
Once logged in to your dashboard, select the "VPN Connections" card.
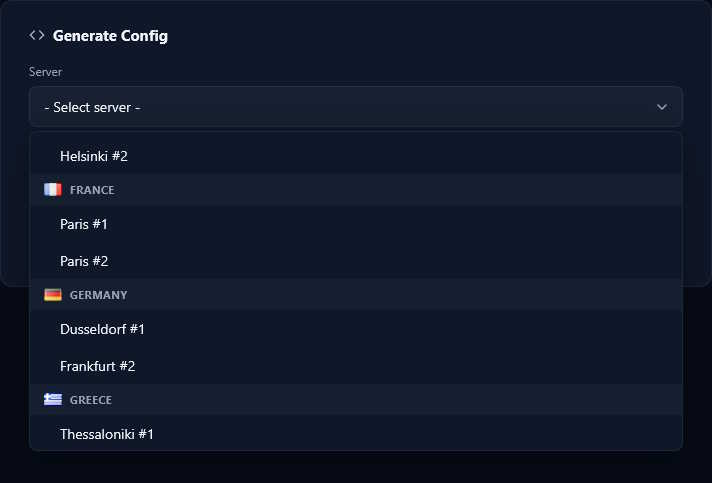
You will be taken to the configuration retrieval page. Scroll down to the "Generate Config" card and select the server you want to connect to.
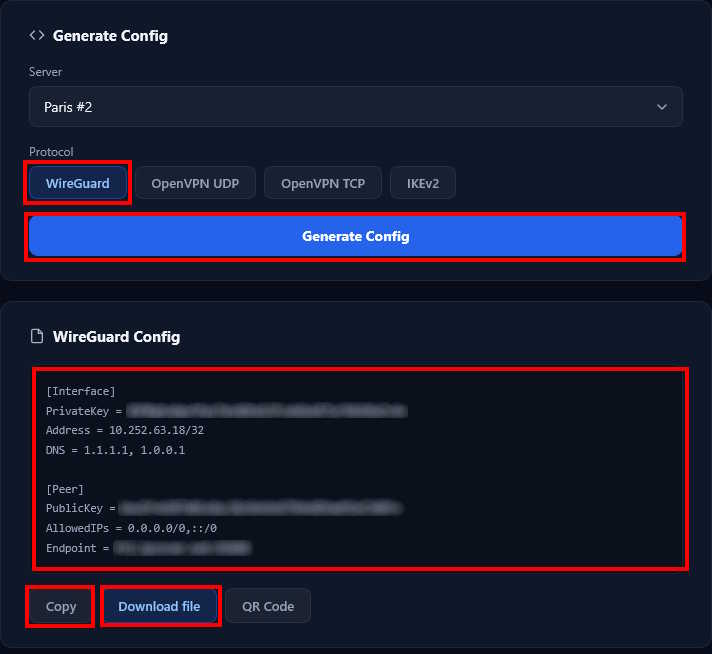
In the card below, select the WireGuard® protocol and click "Generate Config". The configuration details will appear. You have two options:
- COPY - copies the configuration to your clipboard for pasting in the next step
- DOWNLOAD - saves the
*.conffile to your computer for direct import into WireGuard®
Step 3: Add a New Tunnel in WireGuard®
At the bottom of the WireGuard® screen, you will find the "ADD TUNNEL" option.
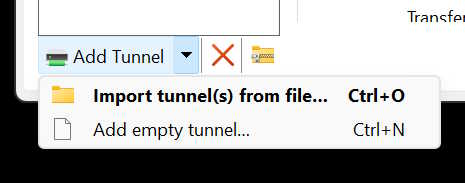
Depending on your choice in Step 2:
- IMPORT TUNNELS - if you downloaded the
*.conffile, select it to import - ADD EMPTY TUNNEL - if you used COPY, paste the content here
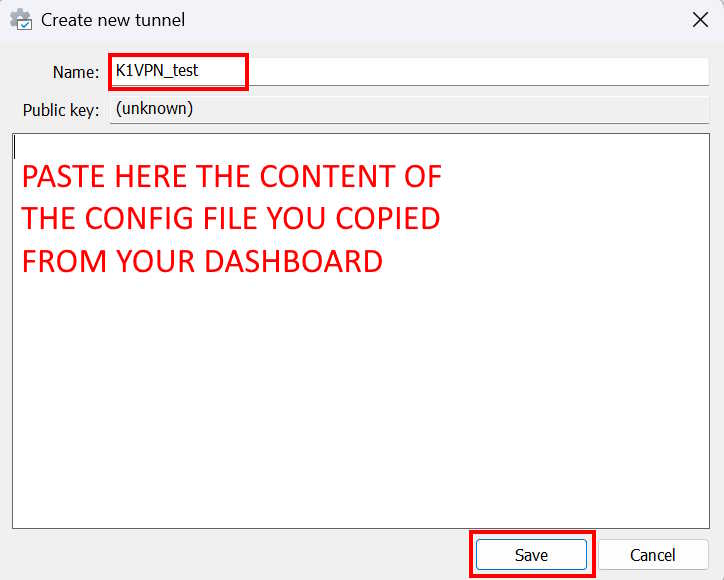
Give the tunnel a descriptive name - e.g. "K1VPN - Germany" - so you can easily identify it among others. Click "SAVE".
That's it! You are now ready to browse anonymously and securely using the fastest VPN protocol on the K1VPN network.
Note 1: You can create and save as many tunnels as you like, but you can only be connected to one at a time.
Note 2 - WireGuard® multiple connections limitation: Due to the protocol's architecture, you cannot have more than one active connection simultaneously to the same server. All your tunnels share a single Private Key - if you try to connect with a second tunnel, depending on the last handshake, one of the two connections will be inactive even if the WireGuard® app shows it as active.
This limitation does not apply when using the K1VPN app, OpenVPN® or IKEv2 - these protocols use username/password authentication and support up to 10 simultaneous connections from different devices.
See also: Connect using WireGuard® on iOS and Android - scan a QR code from your phone. Connect using the K1VPN app - the easiest method for all devices. Connect on Windows without an app - IKEv2 - using the built-in Windows client.
For more tips on security and online anonymity, visit our Security & Privacy category. For K1VPN network updates, check K1VPN News, and for general privacy-focused industry news, Industry News.